Explore: Charging
The charging page is the home of the Ohme app. From here you can see an overview of your charging set up. With quick access to your car, charger, session and tariff settings you’re only one tap away from everything you need to charge.
This article explores the various parts that make up the charging page and how to use them.

Unplugged
-
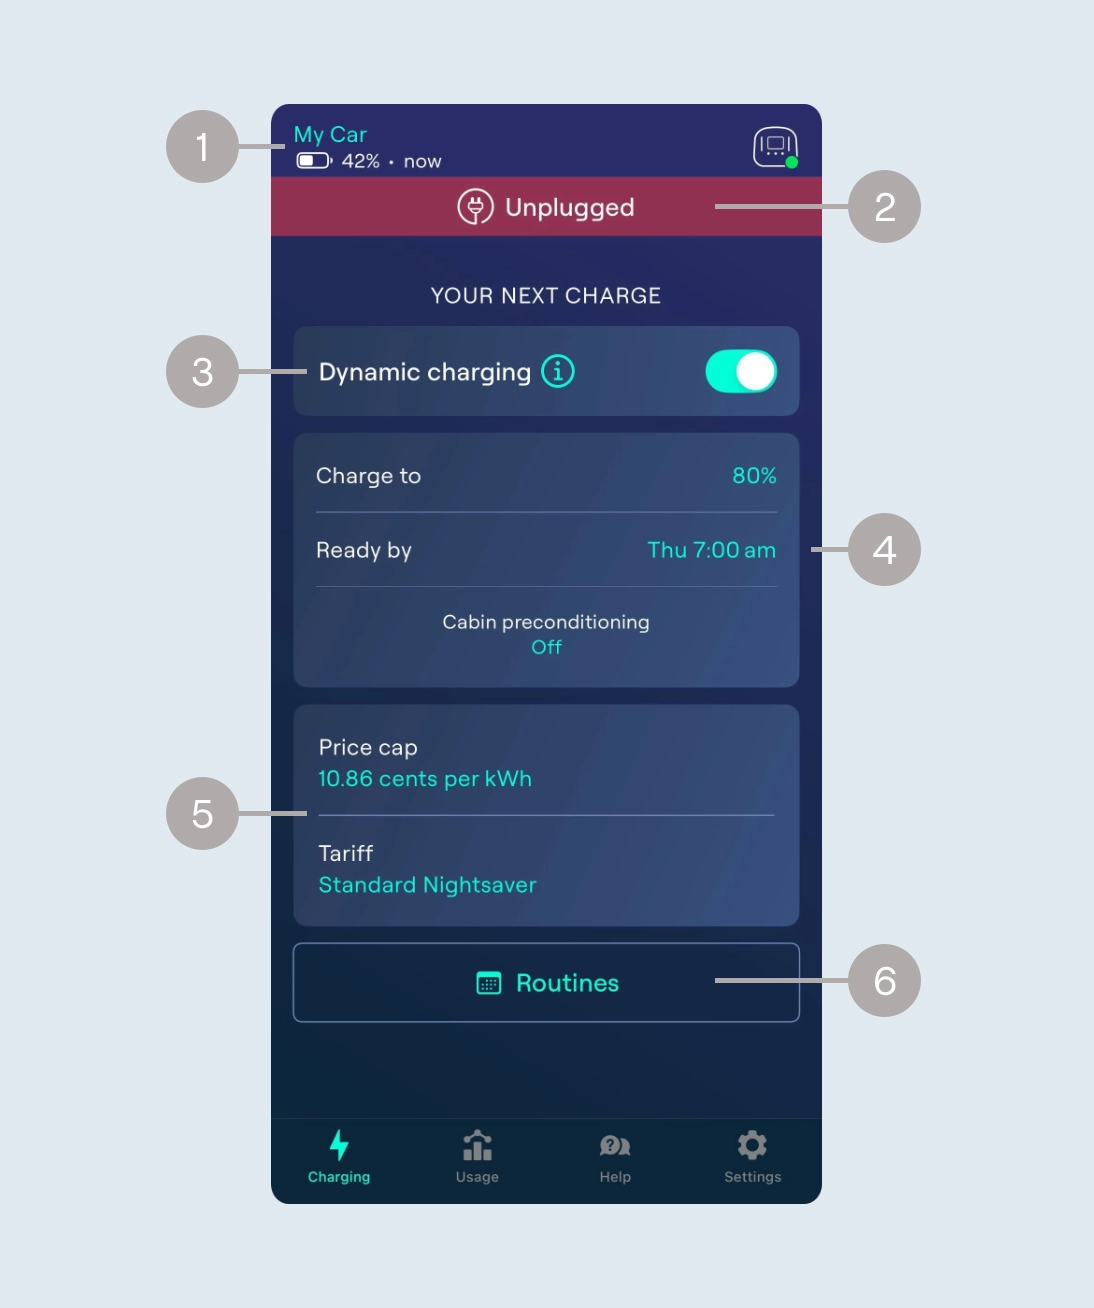
At the top of the screen, you’ll find the currently selected car on the left. It provides one-tap access to the My EV page. If you’re connected to your car app account, you’ll also see the battery status. The top left corner displays your charger’s connectivity status and access to the My Charger page.
🟢 online 🟠 connecting 🔴 offline
-
The status banner will provide context to what is happening. Here we can see the charger is currently unplugged.
-
The ‘Dynamic Charging’ toggle lets you choose between instant charging at full speed (within regulated hours and price limits) and scheduled charging, where Ohme may start and stop charging multiple times at varying speeds.
-
With ‘Dynamic Charging’ enabled you can specify the amount of charge you want, the time you want it to be ready as well as preconditioning support, which allows Ohme to charge you car during preconditioning to prevent any charge loss before departure.
-
Quick access to the price cap settings and My tariff page.
-
Routines offers the ability to save a chosen target and ready by time for selected days of the week.
You’ll see this style of Charging page whenever you charge a car where Ohme is able to retrieve the battery status. This means you’ll be setting a target to reach and Ohme will check in with your car, while it charges to meet the target requested.
Plugged in
(Charge to)
-
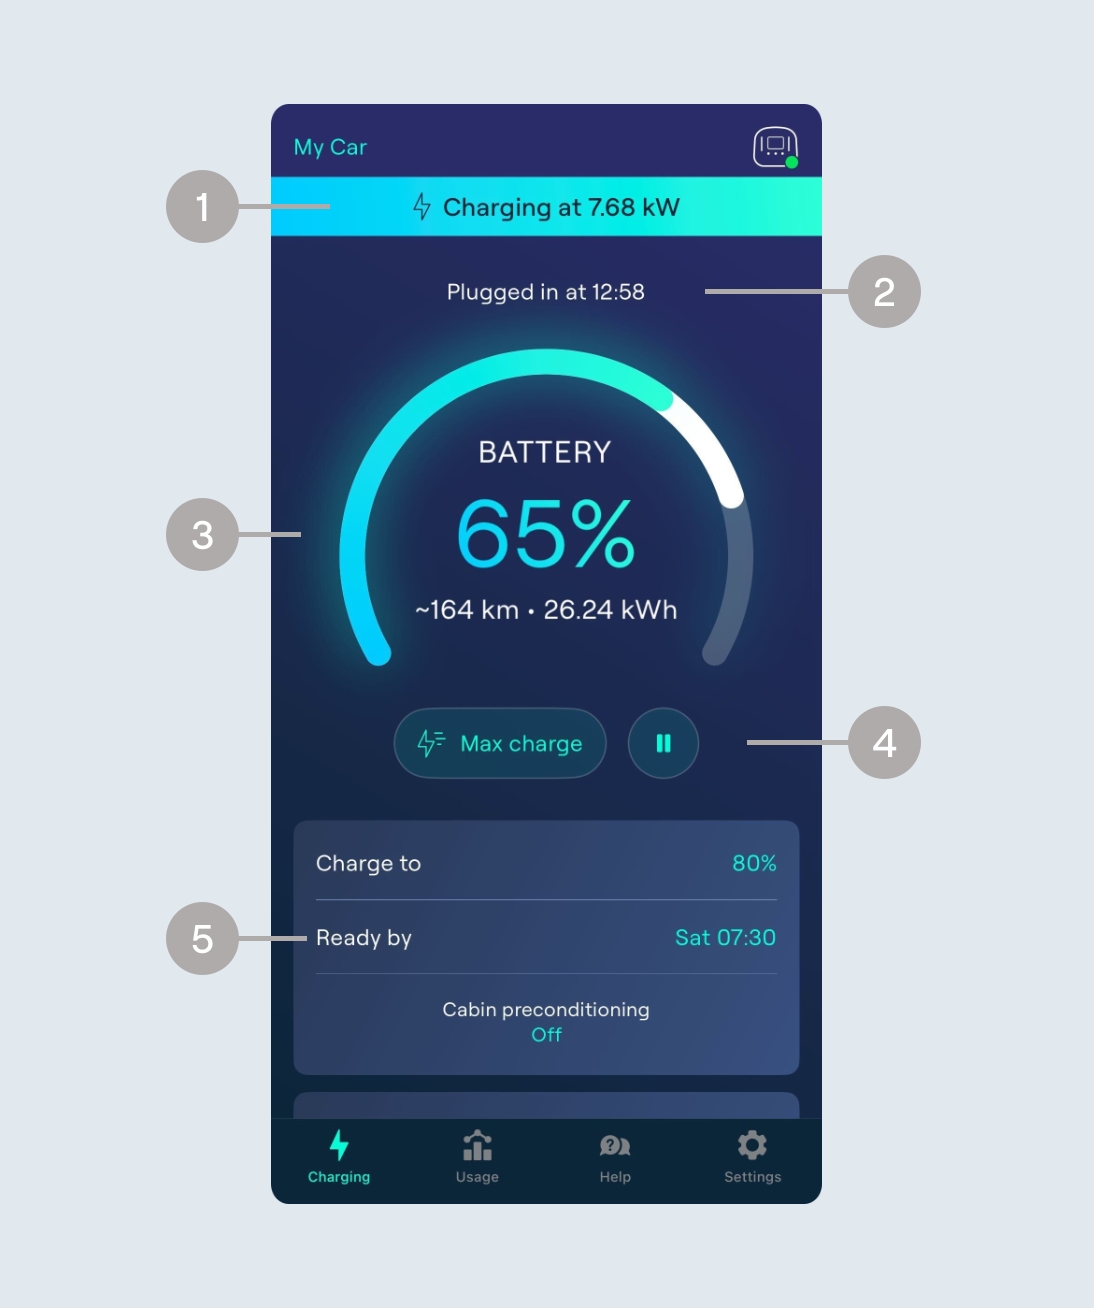
Once a session has started and Ohme has begun charging the status bar will show you the speed Ohme is charging at.
-
Just below the status bar you will see related timings, such as when the charger was plugged in, what time Ohme is due to begin charging or how long until a new session starts.
-
In the middle you’ll see the battery displayed. The white line is the target requested and the coloured line is the battery level Ohme has retrieved.
-
Once a smart charge has begun you have the option to override with a Max Charge, which will start an immediate charge until the car is full, or to pause the session which will begin a countdown to when Ohme will start a new session.
-
At any point during a session you have the ability to change the target, ready by time or other settings such as preconditioning and price cap.
You’ll see this style of Charging page whenever you charge a car where Ohme isn’t able to retrieve the battery status. This means Ohme will assume an empty battery each time you plug in, and will schedule enough time to ‘add’ the requested amount charge to what the car already has.
Plugged in
(Charge to add)
-
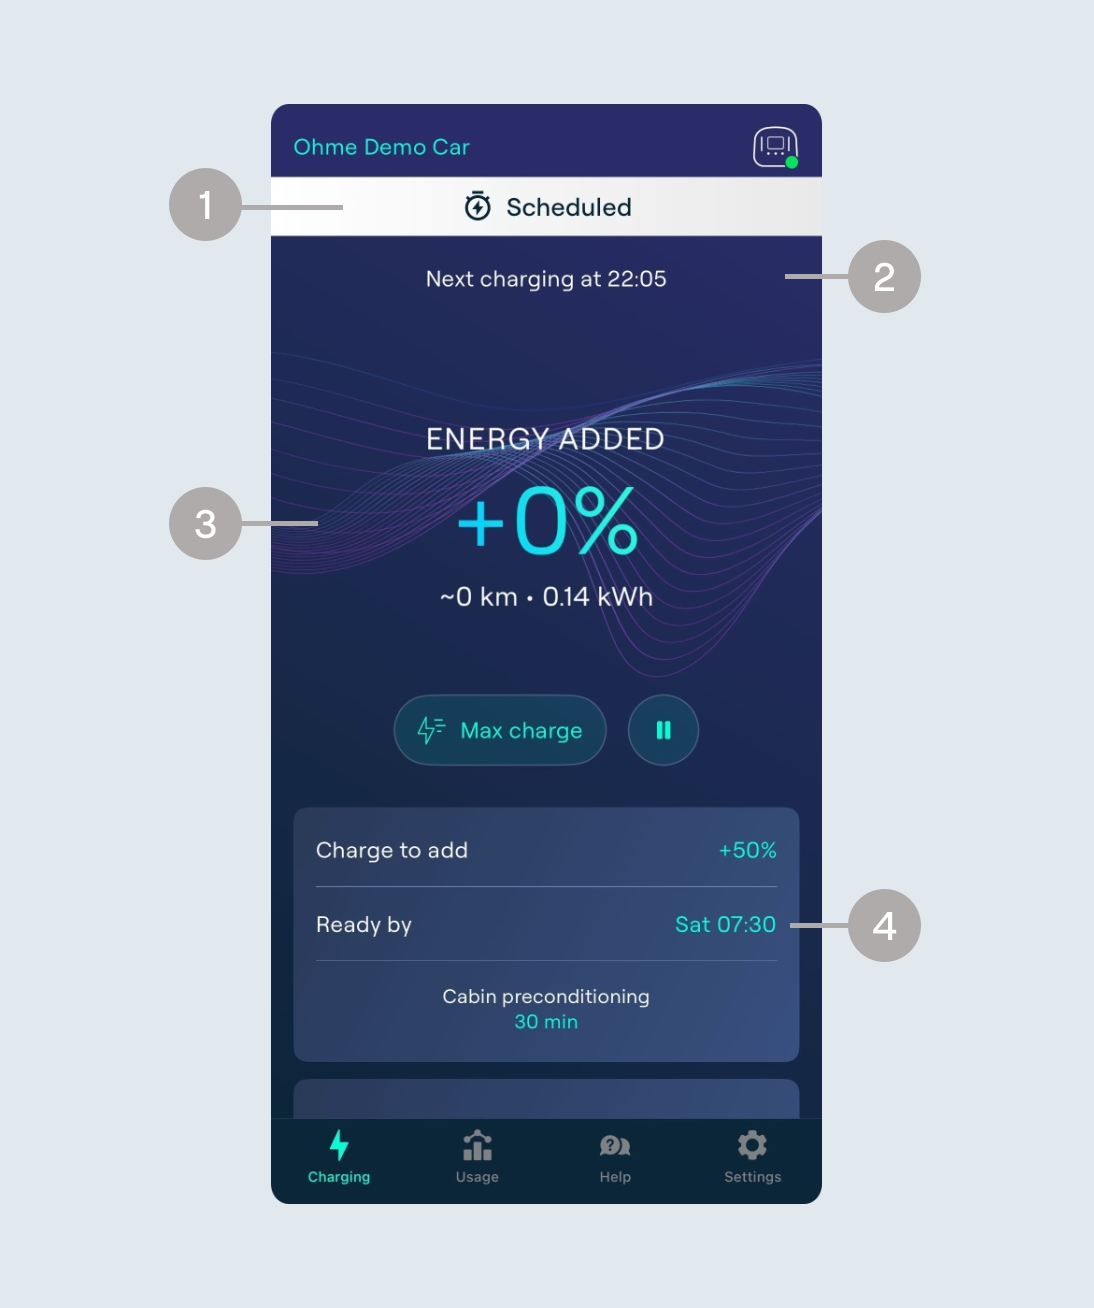
Once a session has started, if Ohme isn’t due to be charging you’ll see ‘Scheduled’ in the status bar.
-
Under the status bar, when a session is scheduled you’ll see the time Ohme is due to begin charging.
-
In the middle you’ll see the amount of battery Ohme estimates has been added so far for this session. You’ll also be able to see the rough estimates for range and the total amount of power added.
-
At any point during a session you have the ability to change the target, ready by time or other settings such as preconditioning and price cap.
Thanks for your feedback!


